
If you’ve previously exported your Outlook data to a .olm file, you can easily import it into Outlook for Mac. This is helpful when setting up a new device, restoring lost data, or accessing archived content.
Step 1: Open Outlook on Your Mac
Make sure Outlook is running and you're signed in to the account where you want to import the data.
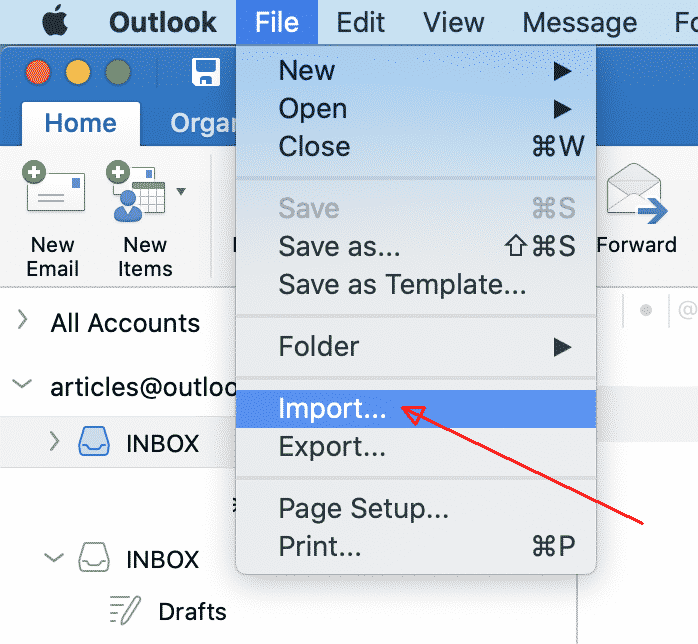
Step 2: Go to the Import Tool
In the top menu bar, click File, then select Import from the dropdown menu.
NOTE: If you don’t see the Import option, make sure you’re using the New Outlook experience. You can switch back to the legacy version if needed by toggling the switch in the top-right corner of the Outlook window.
- In the top-left corner of your screen, click the Outlook menu in the macOS menu bar.
- From the dropdown, check the option labeled Legacy Outlook.
- Outlook will prompt you to restart. Click Restart Outlook to apply the change.
Once Outlook restarts in Legacy mode, you should see the Import option under the Tools menu.
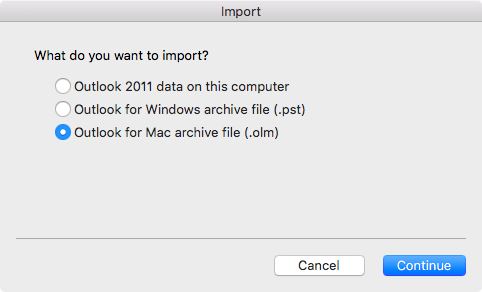
Step 3: Choose the File Type
In the Import window, select Outlook for Mac archive file (.olm) and click Continue.
Step 4: Locate and Select Your Backup File
Browse to the location where your .olm file is saved, select the file, and click Import. Outlook will begin importing your data. This may take a few minutes depending on the file size.
Step 5: View Your Imported Data
Once the import is complete, your data will appear in the On My Computer section of Outlook. You can now browse your restored emails, calendar events, contacts, and more.