
How to Import Content into Canvas
-
Open the Canvas course you want to import content INTO
If you want the content available to you but do not necessarily want it in your actual Canvas course yet, create a personal Canvas course to house the files.
For example, you might want to create a course called “English G10 2016-17” to hold a copy of the files from last year if you want to have them for reference, but do not necessarily want to use the entire course this year. You can then view, edit or download the files (without accidentally changing anything from the original course) and import or upload them to your actual Canvas course later.
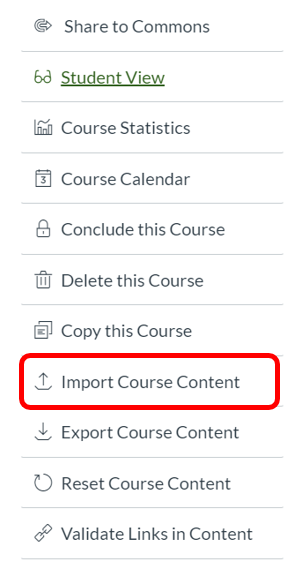
Go to Settings (found at the bottom of the menu bar second to the left)
Click on Import Course Content (near the bottom of the menu bar to the right)
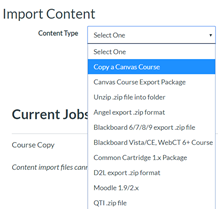
For Content Type, select Copy a Canvas Course
-
In the Search for a course box, click to see a drop-down menu or type the first letters of the course you want to copy from.
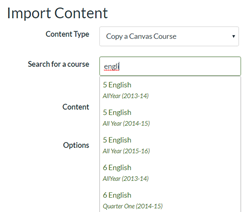
This year you will see a list of every course Overlake offers. As the list is now A LOT longer and contains courses taught by other teachers, you may want to rename your older courses (do not change the course code!) with your name and the school year to make them easier to find.
Check the year carefully!
Click to select the course you want to copy content from.
Use the Content options to decide what content you want to import.
-
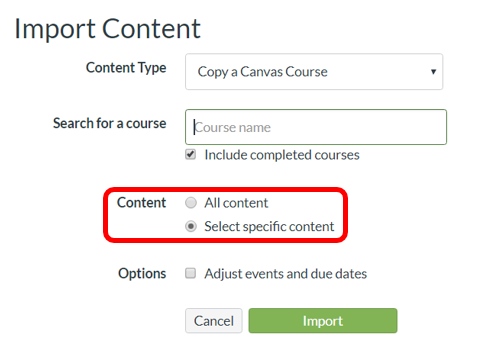
If you want to copy all of the content, click the radial button for All Content
Choose this option if you are not planning to make many changes to course content, handouts, assignments, etc
-
If you only want to copy selected files, click the radial button for Select specific content.
Choose this option if you do not want to import all of the content from the previous course.
You can still choose to import all content with this option, but you can see what you are importing and decide on a more granular level if you want the content or not.
NOTE – you choose your content AFTER you click Import, so nothing will happen now. You will get the “select content” option later.
-
You will likely want to remove or adjust due dates as the academic calendar changes each year. Check the checkbox for Adjust events and due dates
-
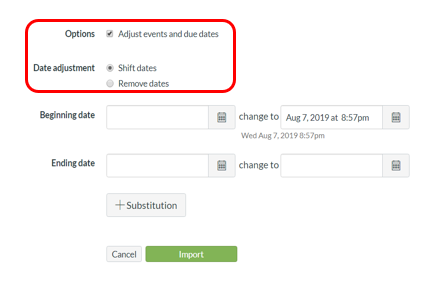
You likely want to Remove dates. This will keep the assignments, but with no due dates.
Previously published assignments will still be published, but they will not appear on the calendar. They will also appear in the course summary.
NOTE – when you remove dates, events are not copied over into the new course. If you want to keep events, you will need to use the adjust option.
-
You can attempt an automatic switch on the dates by clicking Shift dates to add the new course start and end dates.
This may or may not do what you want it to do but should put the assignments in the correct school year and roughly in order.
Previously published assignments will still be published and will appear in the course summary and on the calendar with the new date.
-
Click Import
Under the header Current Jobs, you may either see the content importing or gray box that says waiting for select if you chose to select specific content.
If you see the waiting for select box, click on the green box that says Select Content.

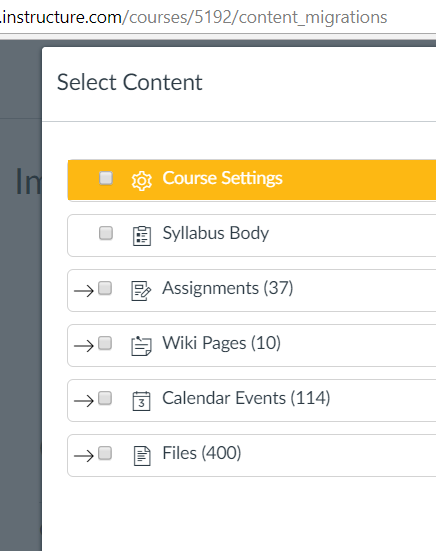
You will see a box of choices that looks like this:
-
Select the content you would like to import by clicking the checkbox for the items you want to import.
To see a list of all items in a content category, click on the arrow
If there is something you would not like to import, leave the checkbox blank and it will not be imported.
Note – all course materials will be stored in the original course unless you delete it, so you can always import more content later.
When you have selected all the content you need to import, click the green Select Content button and your content will start importing.
You can watch the progress of your import under the header Current Jobs.
When you see the green completed button, your import is complete!

After
importing
-
Assignments, modules and files that were previously published will be automatically published in the new course
If you do not want the items to be visible to students, you will have to individually unpublish the assignments after you import.
-
Published items have this symbol:
- Unpublished assignments have this symbol:
Click the symbols to publish or unpublish accordingly.
Check your due dates and adjust appropriately.
For more information: https://community.canvaslms.com/docs/DOC-10288-415257077