
At the beginning of the school year (and also trimester/semester for non-full year classes) you get a brand new blank Canvas course for each class. You can build a new course from scratch or you can import materials from a previous year or another teacher. The guide below presents some of the common tasks and questions we get at the beginning of the year.
Canvas Guides
Canvas has a great set of help documents that can help you teach yourself new ways to use Canvas
How do I import content from last year or another teacher?
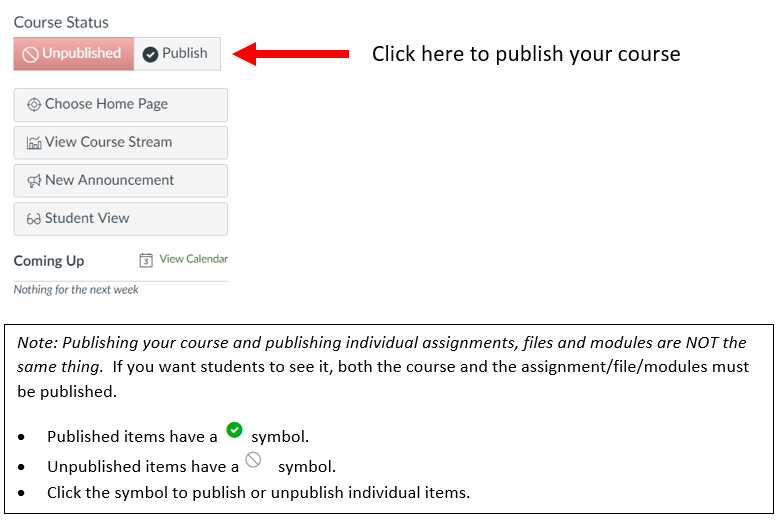
How do I publish my course?
When you have your course ready for students to view, you will need to publish your course. If you do not publish your course, students will not see any course materials or calendar items. If students are reporting that they cannot see course materials be sure both the course and the item are published!
NOTES:
- You cannot message students in your class until you publish your course.
- Students gain access to PUBLISHED Canvas courses just before school starts. If your students need access before school starts, please contact the tech@overlake.org for assistance.
- If you are posting a large number of files or assignments, it is nice to have them ready and published before you publish the course to avoid sending a large number of notifications to students as you publish individually.
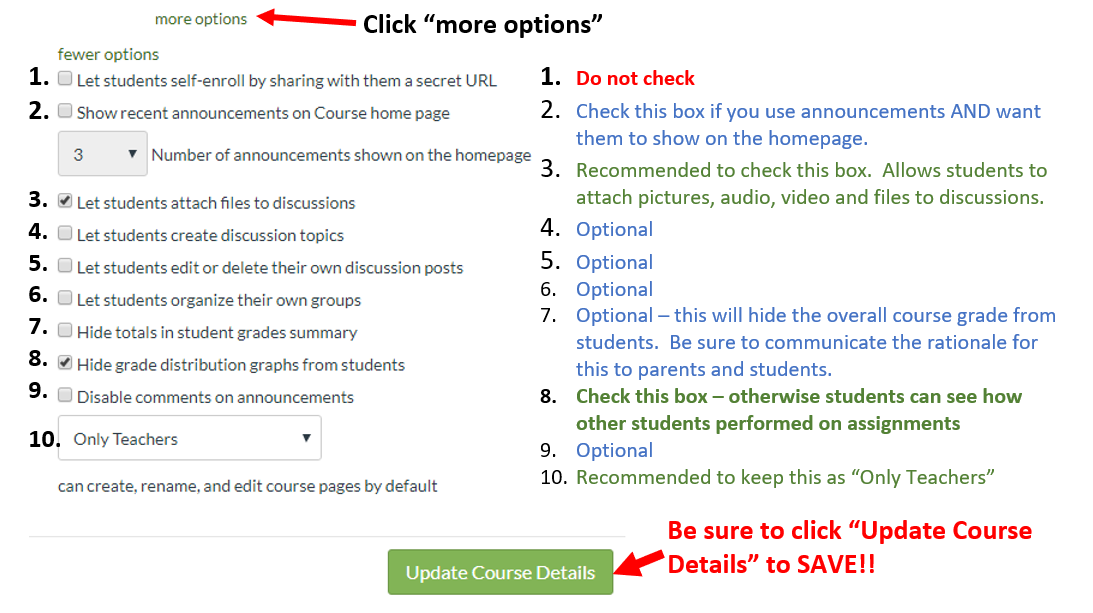
What settings should I use in my course?
Access your course settings in Canvas by clicking Settings in the bottom left of the navigation menu on any page in your course.
2. Student View
(also accessible from the Homepage of your course)
Student view allows you to experience your canvas course as a student. You can view the course, click through modules, take quizzes, submit assignments, and view feedback and grades. Teachers find it useful for previewing content and for solving “I can’t see XYZ on Canvas” problems.
The purple bar at the bottom of the screen will tell you that you are in student view.

- If you try out submitting assignments and providing yourself with feedback, you can clear all of that data by clicking Reset Student.
- When you are done, click “Leave Student View” to return to your normal teacher viewing experience.
Note! Using Student View will create a new student in your gradebook called “Test Student.”
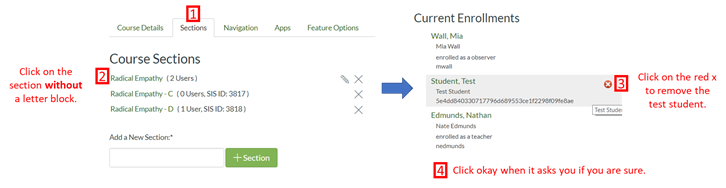
Remove the Test Student from gradebook
(will reappear every time you use Student View)
Go to Settings > Sections
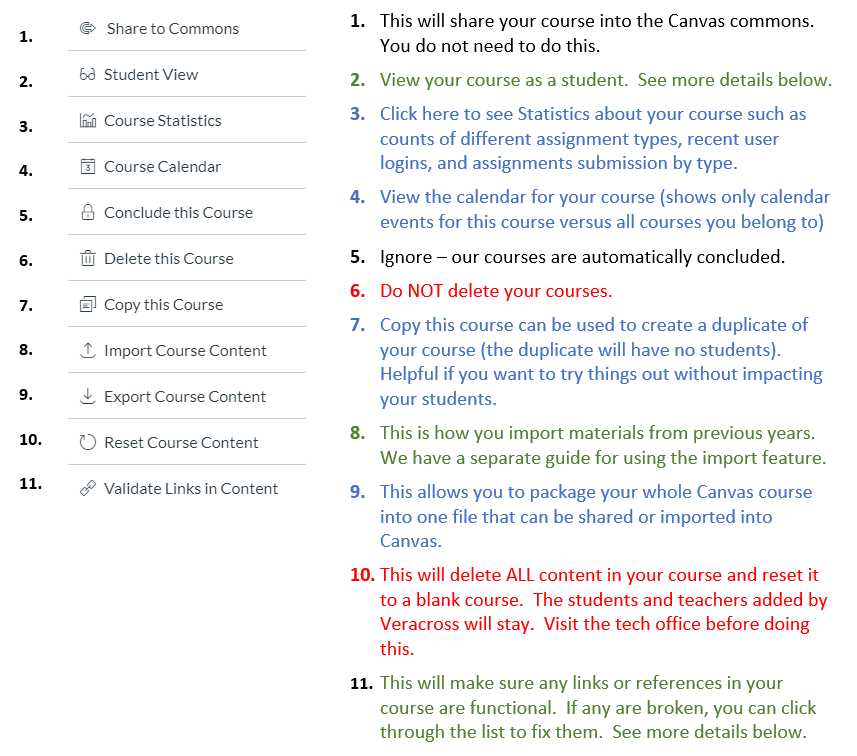
11. Validate Links in Content
If you have imported content from a previous year or have a lot of links in your course, this feature will verify that your links are still valid. Click “Start Link Validation” to begin. It will return a list of broken links for you to fix. Visit the page or assignment with a broken link, update the link and save. Run again to confirm that all links are active.
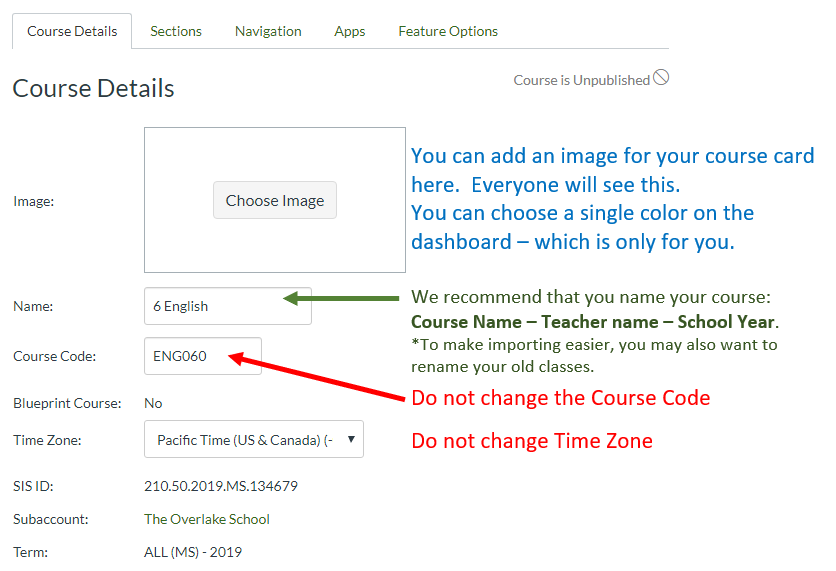
Settings > Course Details


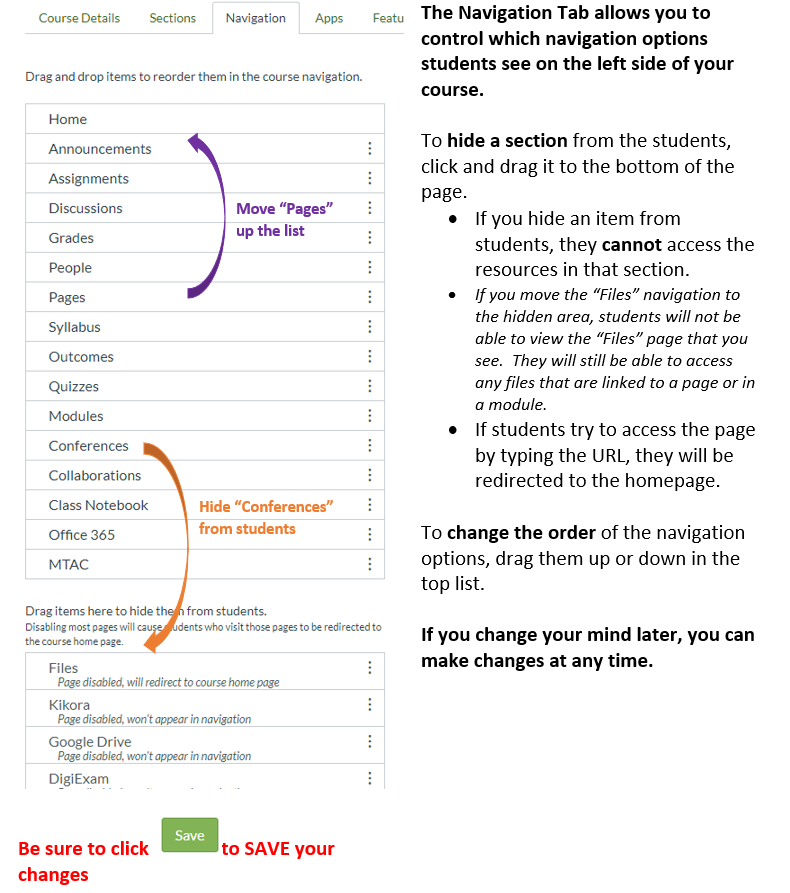
How do I change the student navigation menu on the left?
Click Settings > Navigation
How do I create categories to weight my grades?
You can create assignment groups to weight your grade by category instead of using total points.
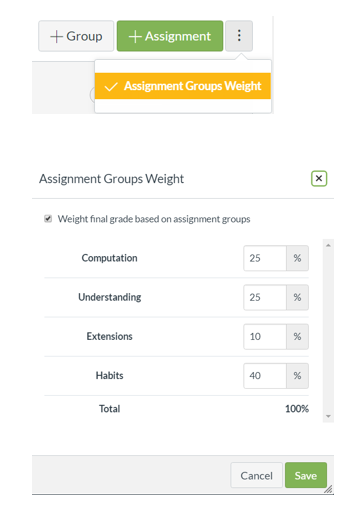 |
|
Want different weights for second semester? Create your groups and add the label S1 to each group name. For example: S1 Computations
- When semester 2 starts, create a second set of groups with S2 to each and set different weights.
- Do NOT delete the S1 groups or change the weights for S1 after grades are submitted.
- Be sure to add assignments to the proper group including semester!
Detailed instructions: https://community.canvaslms.com/docs/DOC-10059-415267002
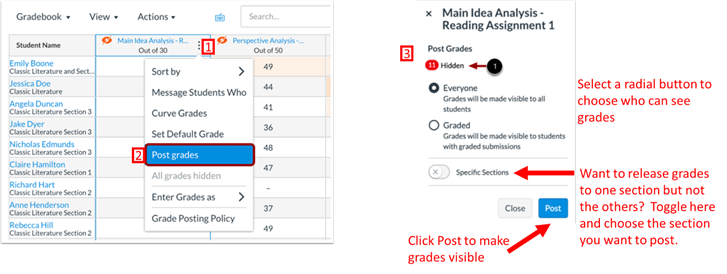
How do I automatically hide or post my grades using a grade posting policy?
In the gradebook, click the Gear for settings.

The Grade Posting Policy tab allows you to change grade posting policies for your course.
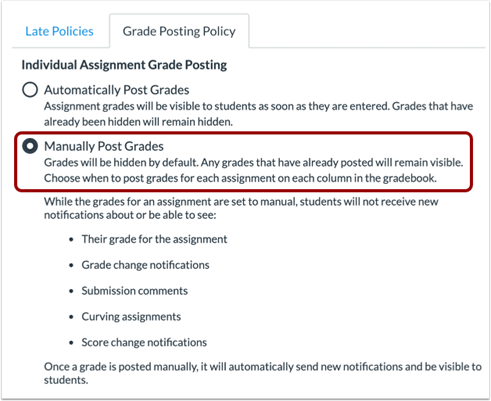
- To automatically post grades and make them visible to students as soon as they are entered, select the Automatically Post Grades option. The posting policy is set to Automatically Post Grades by default.
- To hide grades by default and manually choose when to post grades and make them visible to students, select the Manually Post Grades option.
- Until you post the grades, students will not be able to see their grades or view your comments.
-
To Manually Post Grades
- Click the three dots on the assignment you want to post grades
- Click post grades
- Choose your settings
- Click Post
See this article to learn about the more granular options for hiding and posting grades.